


Stripe Checkout
Introducing Stripe Checkout
Stripe Checkout aims to improve the customer experience when making a payment and reduce certain payment handling issues associated with:
- Non-mainstream payment methods such as SEPA
- Additional authentication methods during payment (3DS Authentication)
We recommend enabling Stripe Checkout if customers are facing issues during checkout.
Enabling Stripe Checkout
Stripe Checkout is controlled at the Pricing Plan level which will allow 2 different sign up links to control payment flows.
- On your platform, head to Products -> Pricing Plans and click the blue plus button at the top right hand corner to create a new pricing plan.
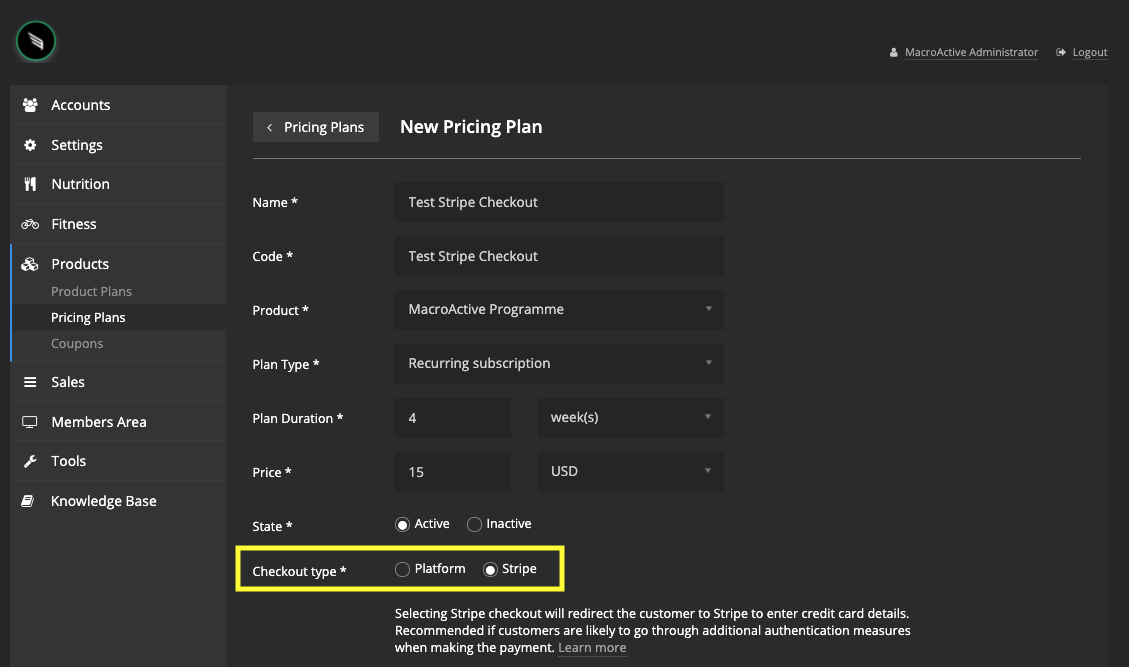
- Enter in the Name, Code, associated Product, Plan Type, Duration and Price.
- Tick Stripe next to Checkout Type.
- Then Save.
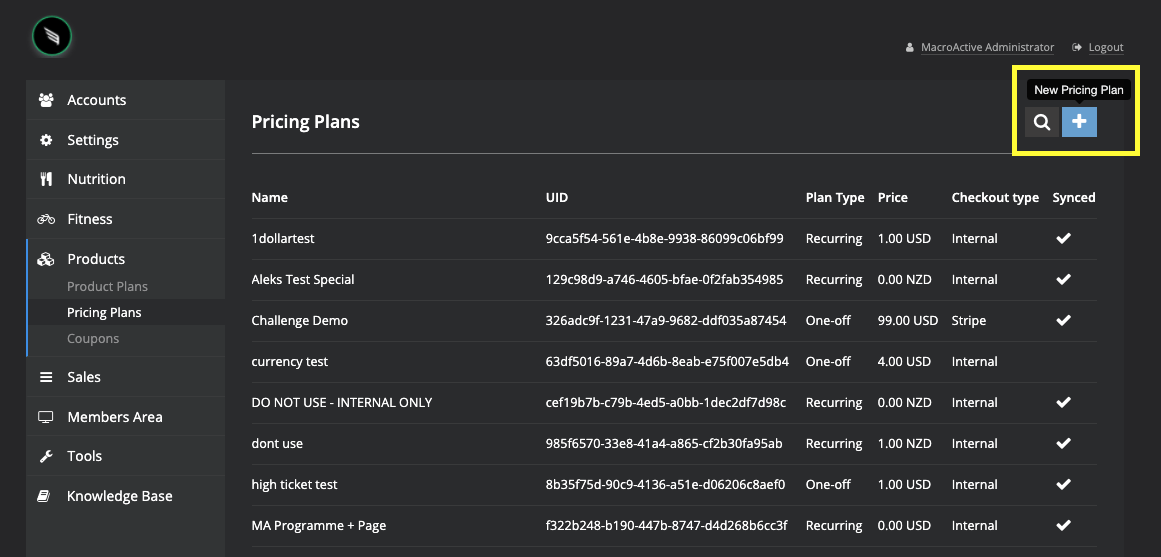
- Search for your new Pricing Plan and
"Sync with Financial Systems" - Stripe.

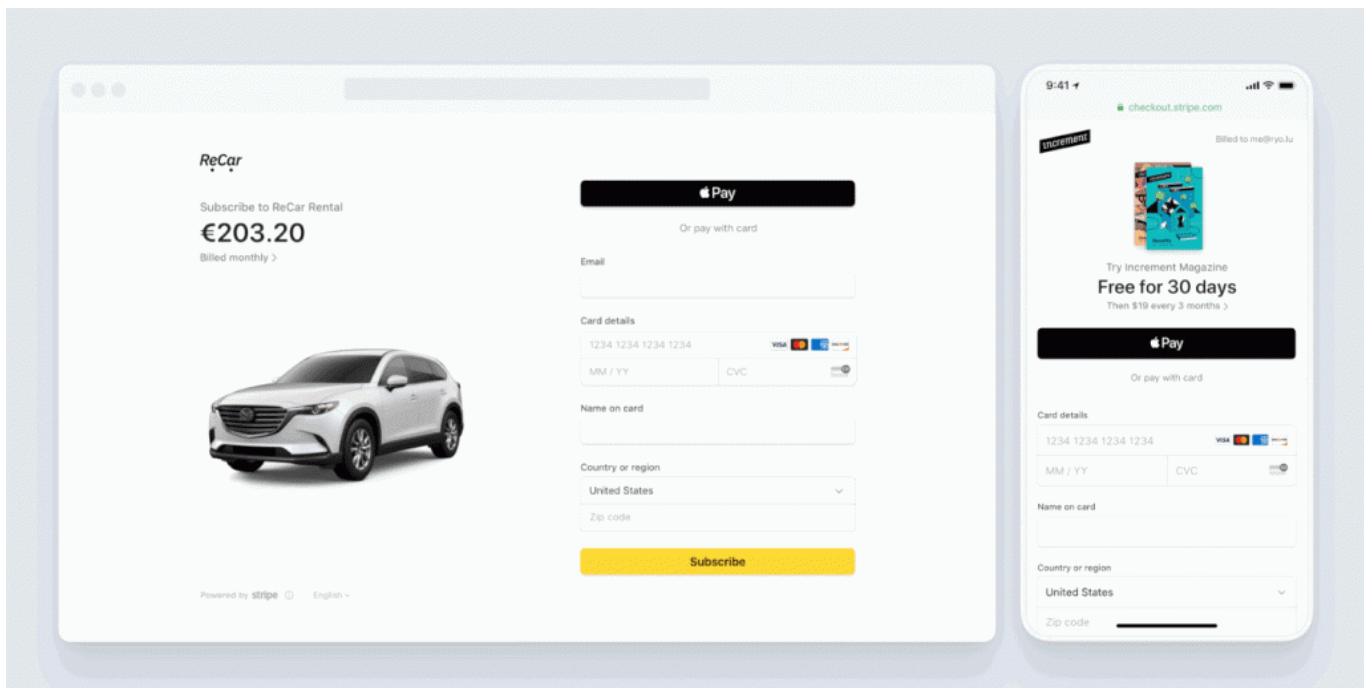
Checkout flow with Stripe Checkout
Below is a sign up flow of a Pricing Plan with Stripe Checkout

Look and Feel Customisations
The below aspects can be customised on Stripe through Branding Settings:
- Logo
- Background and button colours
Using Coupons with Stripe Checkout
In order to use coupons with Stripe checkout, you will need to upgrade to the Stripe Billing Product for an addtional %.
- Alternatively, use Macroactive checkout if you want to use coupons.