

Adding a Category
Adding a Category
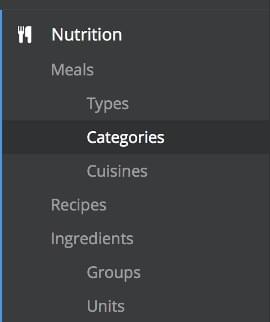
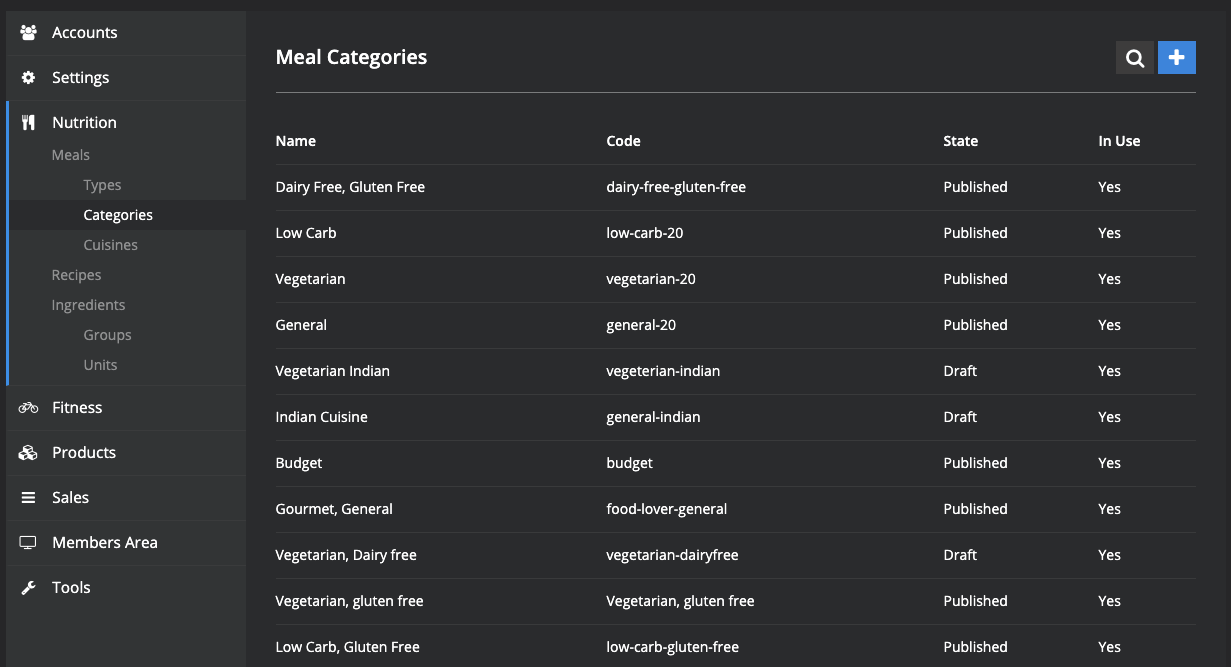
- In the nutrition section click categories:
- Click the blue plus sign to make a new category
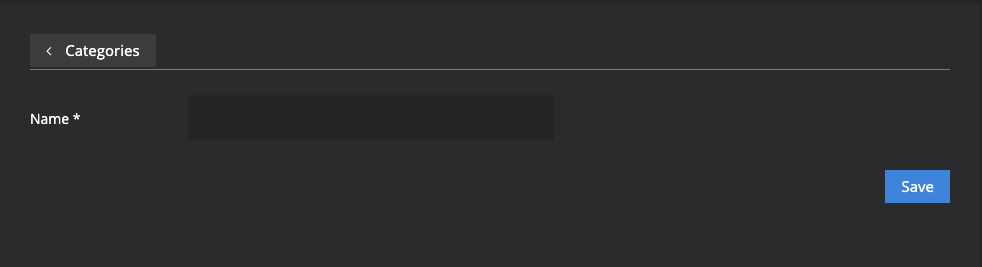
- Enter in the category Name (e.g. Mediterranean). Click Save
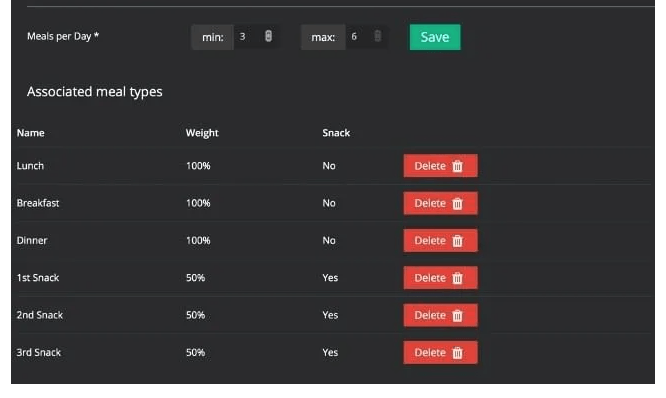
- Link the meal types (Lunch, Breakfast, Dinner, 1st Snack, 2nd Snack, 3rd Snack) by selecting from the drop down menu and then click Add.
- A main meal should be weighted as 100%, and a snack as 50% (so that a snack will be roughly half the calories of a meal)
- A main meal should also be labelled as "Snack = No" as this means it will make sure the meal takes into account the min protein and fat requirements. A snack should be labelled as Snack = Yes, as this means a snack does not take into account the minimum fat and protein requirements (this allows items such as fruit to be used as snacks).
- At the top of the screen, enter in the min and max for number of Meals per Day (most commonly min = 3, max = 6)
- Click Save
- You then need to click
Edit Category shown at the top left hand corner of the screen.
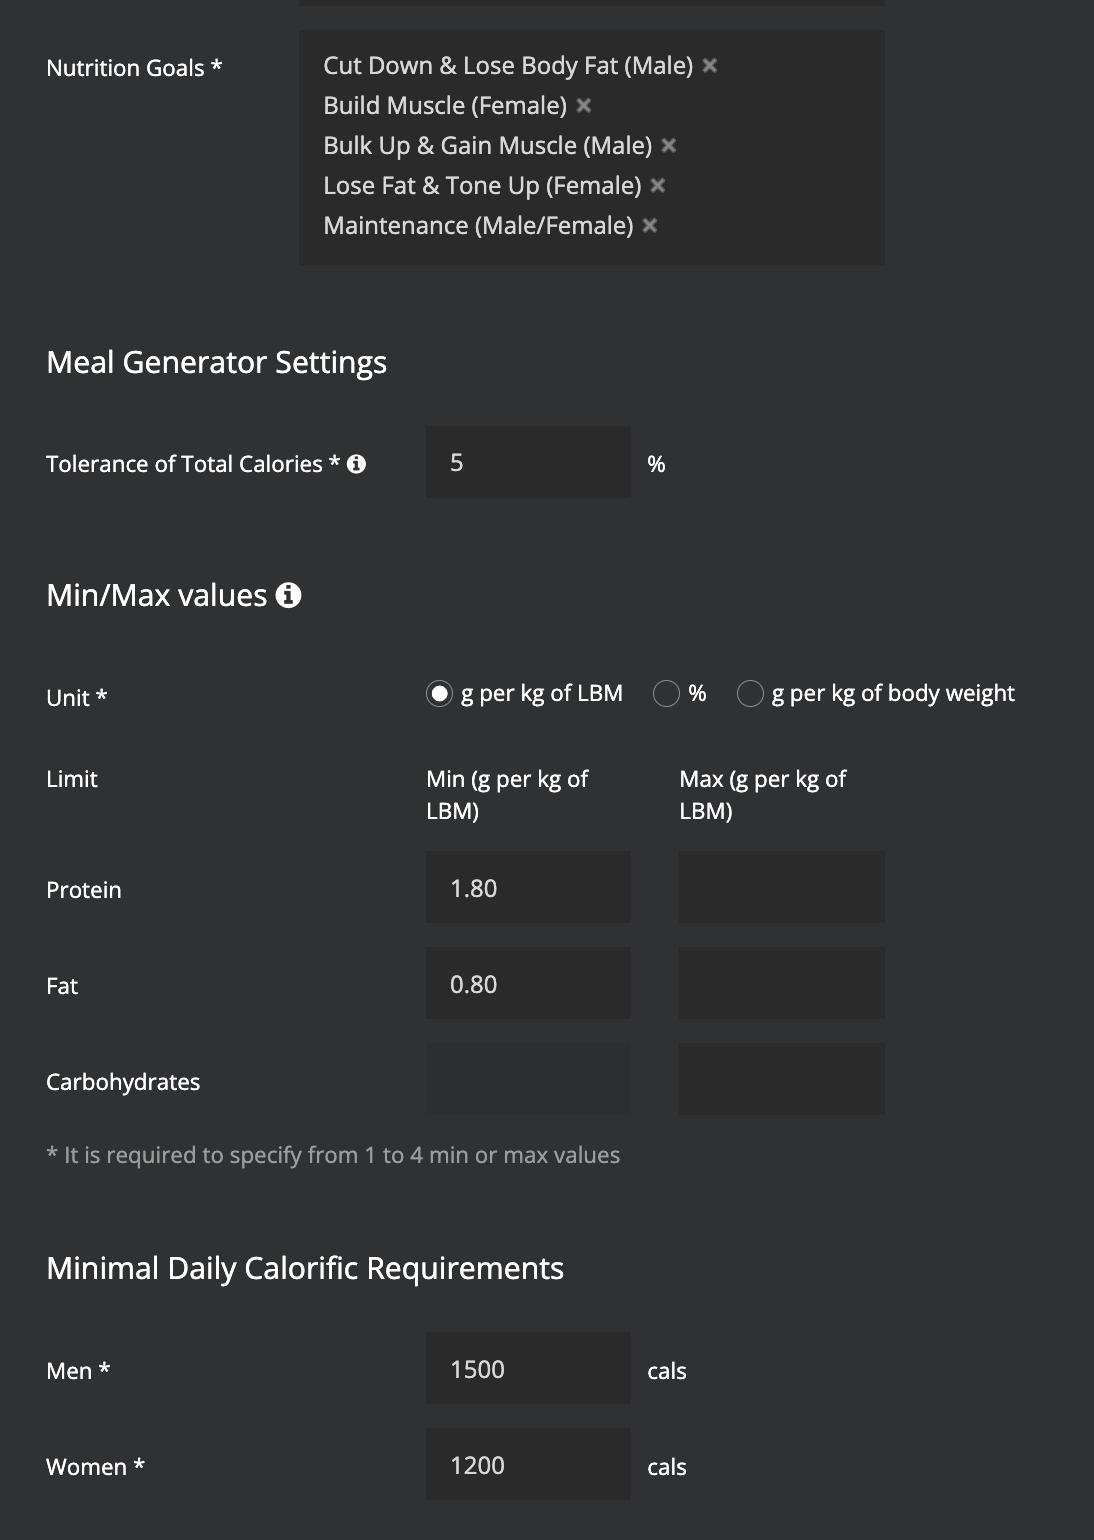
- Select Nutrition Goals that are relevant for this category (e.g. Cut down and lose body fat); all nutrition goals should be relevant for most categories.
- Scroll down to adjust the Meal Generator Settings and see this guide for more information
- Generally, minimal calorific requirements are entered as 1500 cals for male and 1200 cals for female.
- You can also enable a Refeed Day & Vegetarian Day if appropriate. See
Vegetarian and Refeed Day Settings

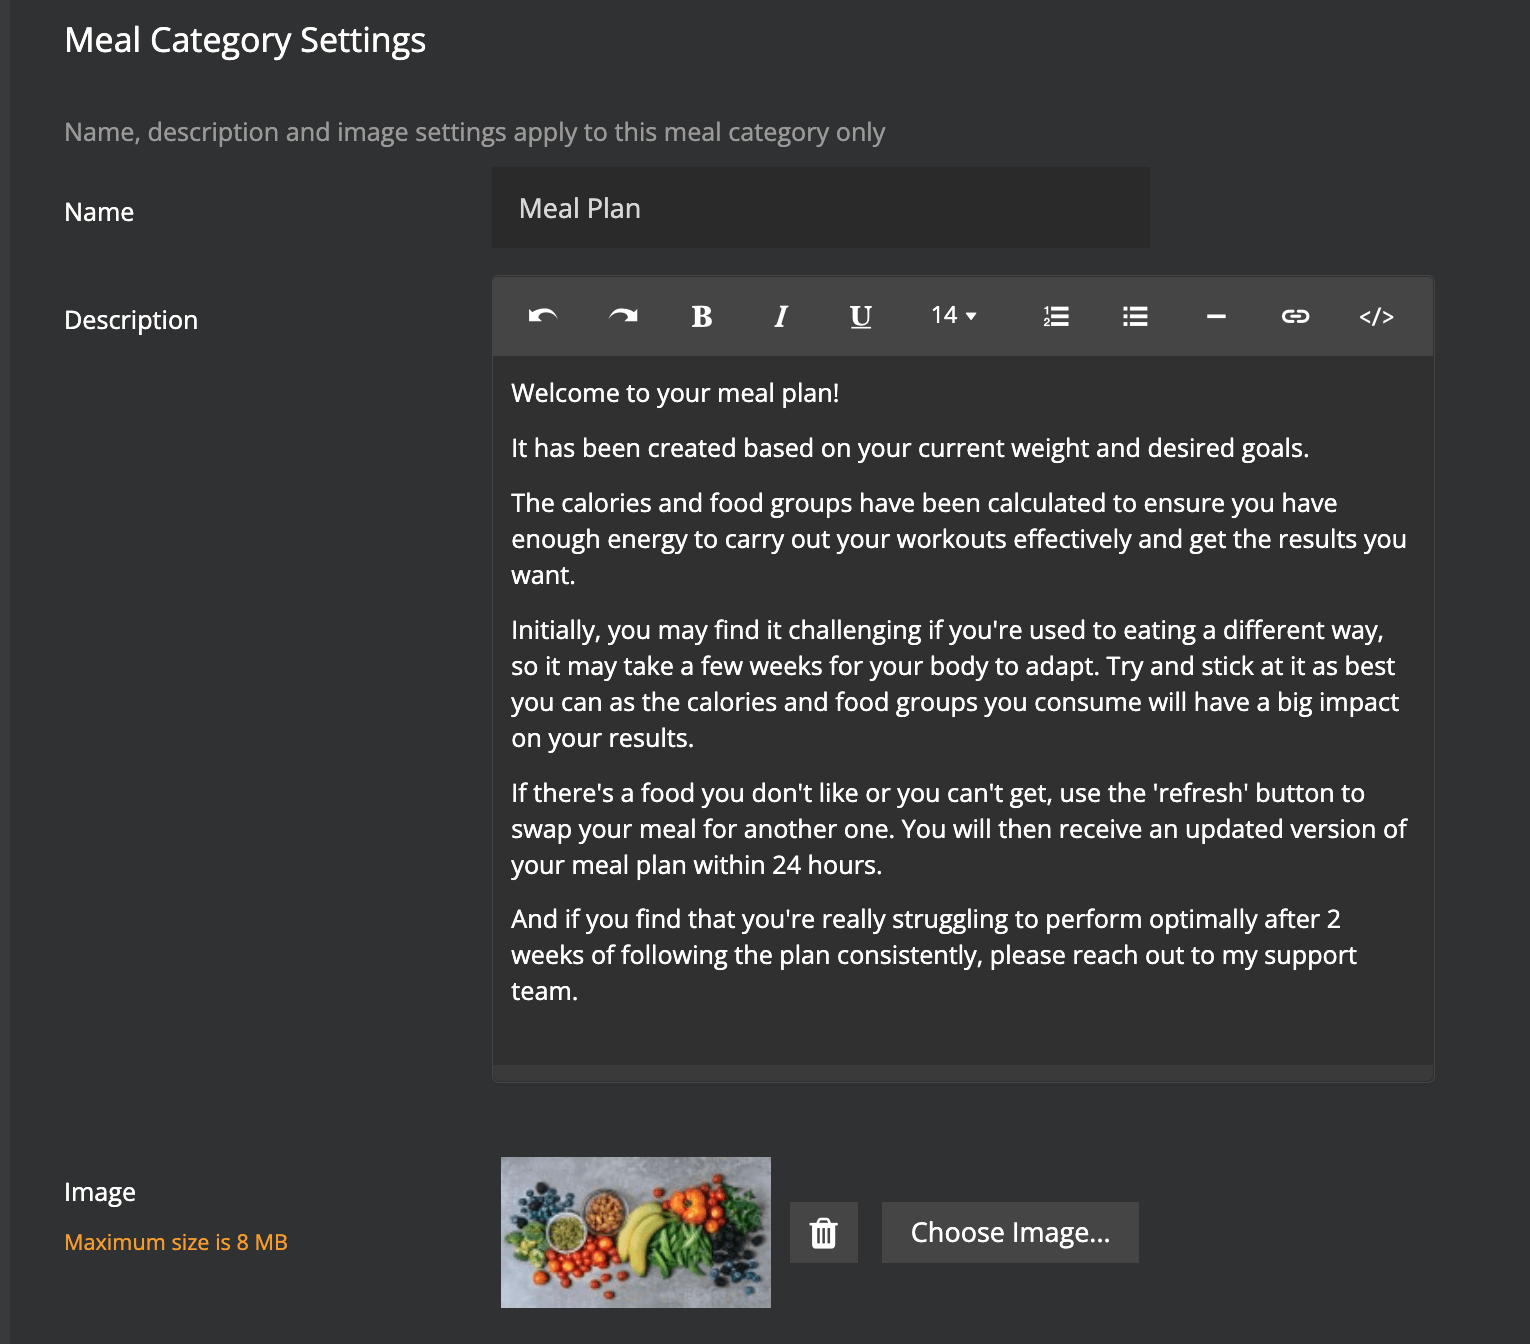
Lastly, add a name, description & image for this nutrition category which will show on your customer's meal plan.
The description will also show up when they click on the lightbulb button.
Once you have finished setting up your new category - we recommend clicking Save as Draft so that it is not yet visible to your customers.
Now, you can go through the Meals on your platform and tag the appropriate meals to your new category.
There are 2 ways to do this:
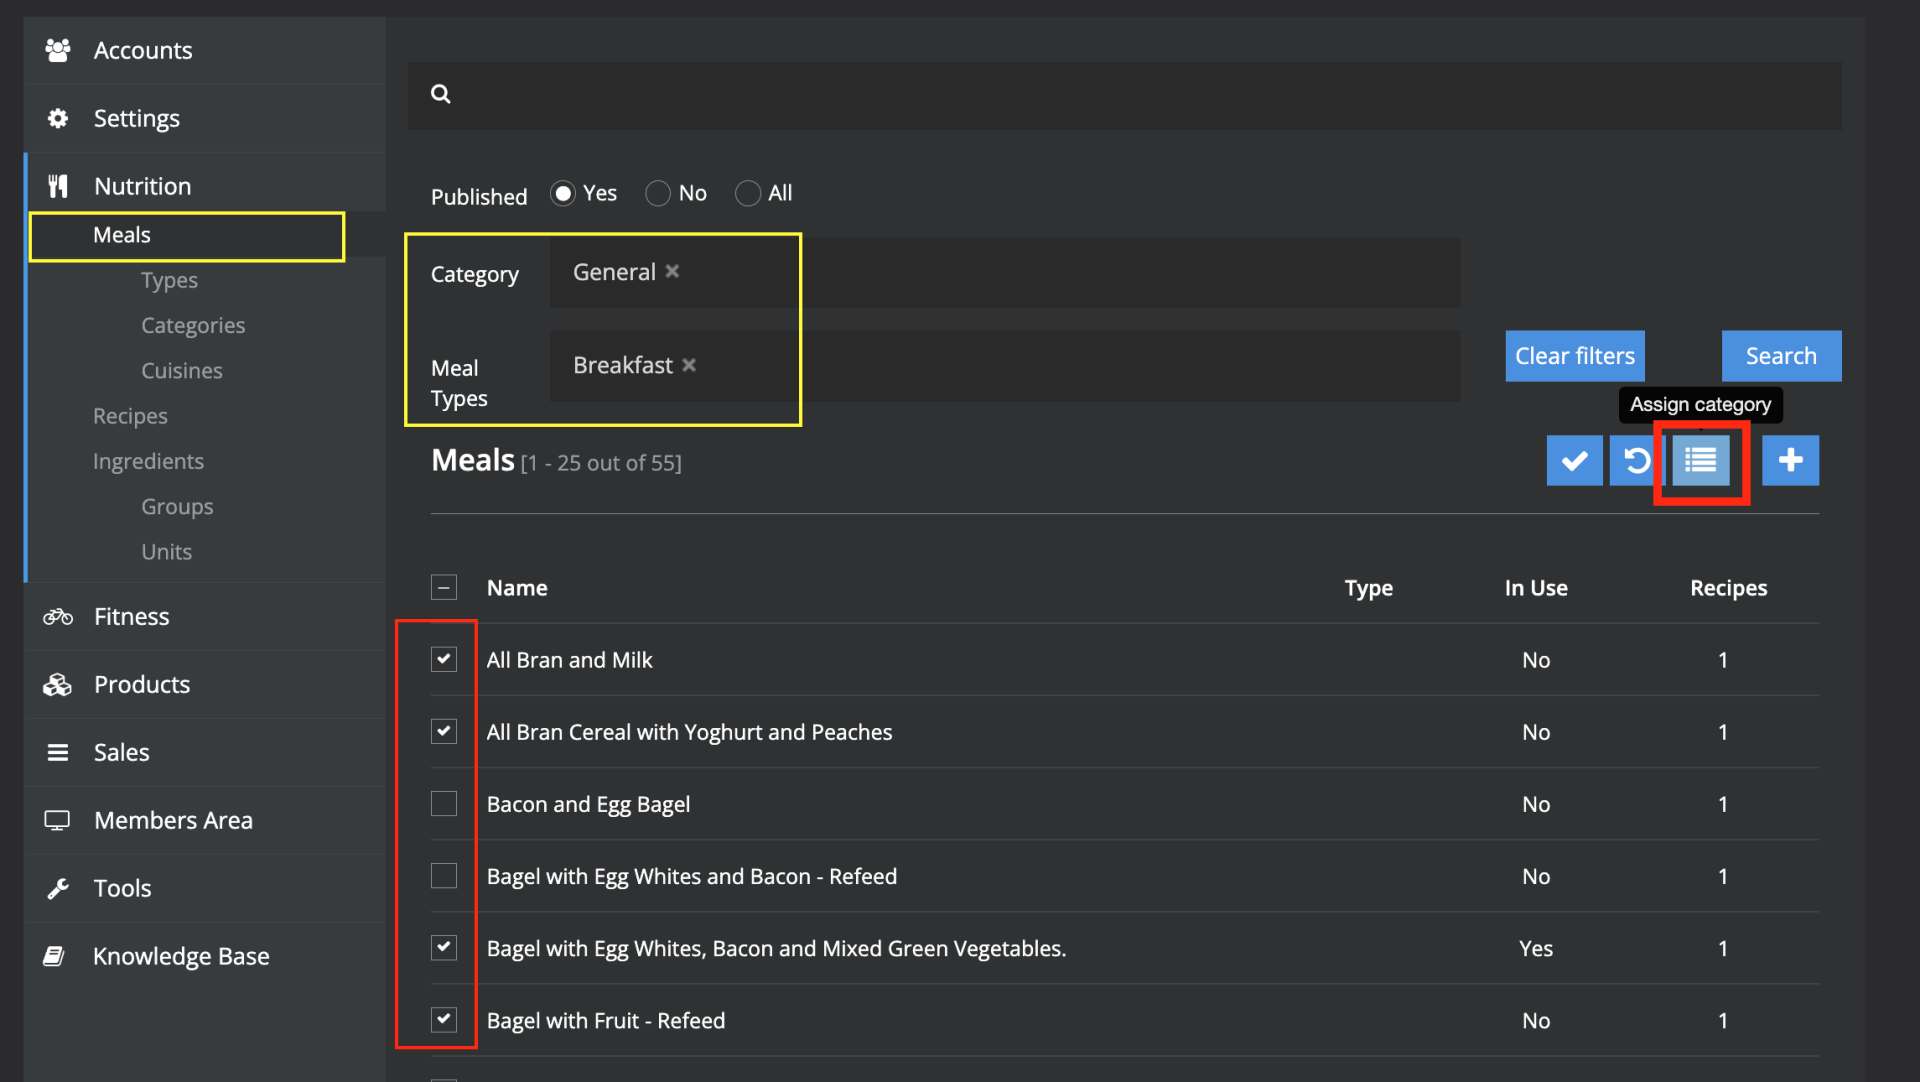
Use the
category and meal type filters at the top so you can filter your search then tick the box alongside each meal that you wish to tag to your new category (Note you can only do this one page at a time). Next, click the button at the top right to assign the selected meals to your category.
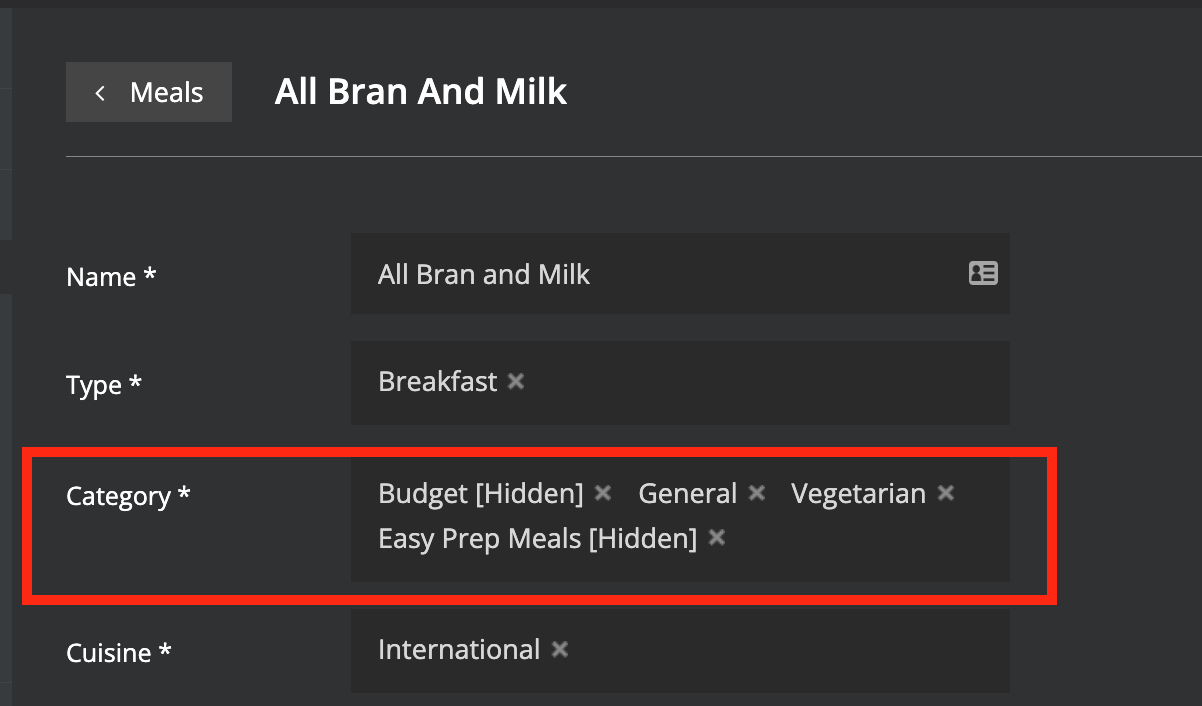
Alternatively, you can click Edit next to an individual meal and add your category to the Category box. Next scroll down and click Save.
Finally, you can test your nutrition category using the Meal Generator Tool
- We recommend testing for a variety of customer requirements to ensure that meal plans can generate successfully.

Please contact support@macroactive.com if you need a hand setting up or testing your nutrition category.